
People sometimes assume all that separates the expert from the common person are the tools they use. Of course, there’s usually a lot more to it than that. Knowledge, experience, technique-these all play vital roles, but ask any cocktail enthusiast about the tools they use and most will admit that they can make a decent drink with anything, but that they would rather use the tools they know and love. Some objects around the bar have become ubiquitous: the Boston shaker, the Hawthorne strainer-but even as we start to list such items it’s hard to ignore the diversity that exists among them. If you like to make drinks and you’ve experimented with different tools, chances are you already have a few favorites.
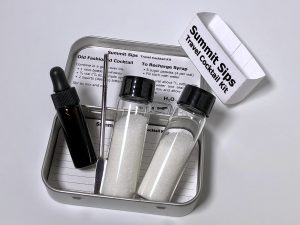
One of our favorite jiggers is the OXO Mini Measuring Cup. We are not alone. Look around the internet and you’ll find plenty of alternatives, but many who favor measurement over free-pouring are using stainless steel jiggers-or this handy little cup. Its wide rim accommodates a hand citrus squeezer where a jigger would be too narrow, saving the extra step of squeezing into another cup first. It’s also clear so you can see what you are pouring against marks for ounces, tablespoons, milliliters and cups. When pouring thick ingredients like syrups, you can let the measuring cup just tumble upside down into a mixing glass where it will get caught in the top half of the glass, dripping the last bit of whatever into the mix below while you grab the next ingredient.
Fine and Flawed
Yet, despite its benefits, the Mini Measuring Cup is not for everyone. First of all, it’s plastic, and although that may make it easy to clean, easy to read, and inexpensive, it’s not the most attractive item on the bar. It also has a few flaws. For example, there’s no 3/4-ounce mark. You may have seen Robert Hess mention this a few times on The Cocktail Spirit videos from the Small Screen Network. We can live with this flaw, but the biggest problem is its shape. The design features an angled slope for the measurement markings which makes them easy to read, but this shape results in a rather small footprint. In other words, the little V-shaped cup has a stability problem. The fact that it’s made of lightweight acrylic doesn’t help. OXO does make one out of stainless steel, but we find that one hard to read in low light and the measurements seem inaccurate in our tests. Can we live with the instability? Not anymore. It’s pretty frustrating to squeeze your last lime into it and then watch it accidentally topple over. No Mai Tai tonight!
We decided to do something about it, and our solution is pretty simple. The cure for the instability is a larger base. Fortunately, OXO used acrylic in it’s construction which can bond cleanly to more acrylic. We decided to make a footed base by fitting a flat, oval sheet onto the bottom. The process is actually more akin to welding than gluing since there is no actual adhesive left behind. Instead, you use a watery solvent that activates the acrylic at the junction of two pieces effectively melting them together. As the solvent evaporates you are left with one solid piece. We will show you what we did, but recommend doing a little YouTube research before messing around with acrylic solvents. Safety comes first when working with this stuff, so be sure you have gloves and eye protection.
Build The Modification
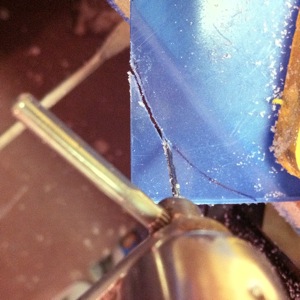
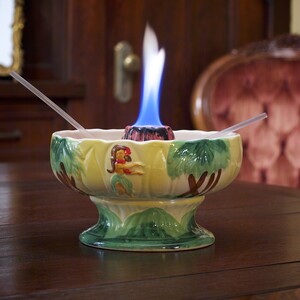
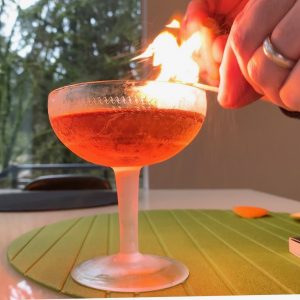
First, we gathered the materials. We used a .100-inch thick sheet of acrylic and IPS Weld-On #4 solvent cement. These can be obtained at a hardware store, although you may have to shop around for the Weld-On.The acrylic sheets come with protective plastic wrap which allows you to trace your pattern and do the cutting without scratching the surface. We inverted the Mini Cup and traced an oval. To cut the acrylic, use a knife to score the sheet and snap it apart like glass. Then, cut the oval using a coping saw and use files to refine the edge. Finally, sand the edge smooth with fine sandpaper and peel off the protective plastic wrap. We chose to give our edges a flame polish by holding the sanded edge in a gas torch for just a moment. The fire polishes the white sanded surface and transforms it into a glossy finish, but to pull this off takes practice.

Next, we sanded the bottom of the Mini Cup with fine sandpaper using 600 grit over a piece of glass, rubbing the cup over that to ensure the bottom was absolutely flat. This is crucial for a good bond. With everything perfectly clean, we positioned the cup over the oval foot and clamped it down so it wouldn’t move.
Finally, using a needle applicator, you can apply the Weld-on solvent. It will wick under the interface between the cup and the foot with capillary action and in just a few seconds, the bond is made. As the solvent evaporates the bond will strengthen with full strength achieved in 24-48 hours. Obviously, you need to wash everything before using it, but that’s all there is to it.

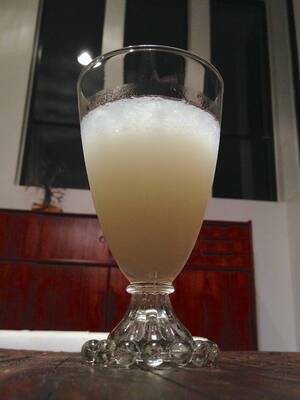
The footed measuring cup can no longer be knocked over. Pushing at it only moves it across the bar. You can press down on the lip and it’s solid. Without the foot, it seemed like the slightest pressure would tip it over. Now, we can set a juicer right on top of it without risking a tumble. With a perfectly aligned oval foot, the cup will even hang from the rim of a shaker tin-a feat not possible with the original. Drips that ran down the outside and onto the bar now collect on the foot, keeping the area cleaner. Overall, we think this little cup is much improved. Now, if only it had that 3/4 ounce mark!


The OXO double ended jigger has the 3/4 oz mark as well as a 1/3 oz, I believe. I find it less accurate to use than my OXO cup though.
Actually, I’ve never had a problem with stability of the cup, though your method to address that looks very well thought out. I’m more frustrated by the lack of the 3/4 oz. marking. I’d love to know a good way to add that mark at home, in some way that would be a) easily readable, b) wouldn’t come off as the cup is routinely washed, and c) wouldn’t be of any material that might leach into the drink (if the mark is on the inside of the cup…I’m not certain that it needs to be.)
I’ve thought about adding a 3/4 mark by cutting into the outside of the cup to make a line. First, add 1/4 oz of water, reserve that, then add it back it on top of 1/2 oz. At that point, you could use tape to make a temporary reference, then either cut a deep scratch with a saw blade somewhere on the outside of the cup, or make a similar cut on the sloped area (again, from the outside) right through the paint using a rotary tool. But it’s probably not necessary. I think the best solution is to simply… Read more »