
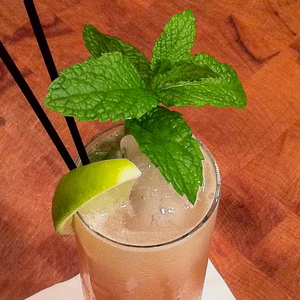
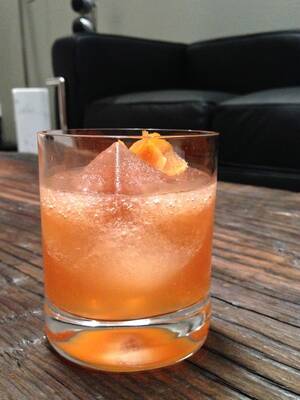
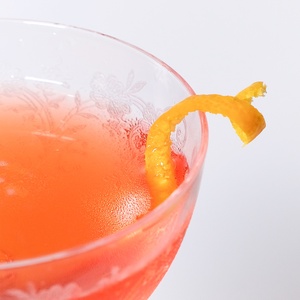
In a recent article, we described the importance of ice in your cocktail, describing the different kinds of ice you may want to use depending on what you are drinking. If you have ever visited the Bradstreet Crafthouse or a handful of other fine destinations, you may have marveled at the drinks that feature incredible spheres of ice—smooth glacial planetoids that literally span the entire width of the glass. Much more than mere aesthetics, these arctic wonders are functional, keeping their cocktails cold while minimizing dilution. That’s because a sphere has the smallest possible surface area for a given volume. Less surface area means less melt, and that results in longer sip time without loss of flavor or temperature.
So how does a bar create a 3-inch sphere of ice? The only answer, up until a couple of years ago was that they carved it! The ice sphere trend started in Japan amidst a mini-craze of whisky drinking. Japanese bar-goers wanted to slowly sip and enjoy their spirits (or maybe they took frequent breaks at the karaoke microphone). It had long been known that large chunks of ice last longer, so eventually someone decided to push that concept to the limit. We like to imagine it was a bright, young college kid majoring in physics or maybe working on a thesis in thermo-dynamics. We picture him as an undiscovered sculptor or perhaps a descendant in a long line of Samurai sword makers.
Method One: Carving
Here is an amazing video featuring one such artist carving away at a chunk of ice until his sphere is just right. You can do this at home. You really can—if you do not mind losing a finger or two! Actually, we understand that the process simply involves chopping away at a cube to remove the eight corners, then chopping at each of the 24 corners that result, and so on until it’s relatively smooth. But we don’t recommend this method. We are certain that if we tried this, aside from slicing our hands, the sphere would come out looking like an ice bean, or a Shmoo. Besides, is this any way to treat your knives? There is an alternative, and it’s a lot easier, but. . .

Method Two: Melt-molding
This video features the Taisin mold, a tool that has revolutionized the construction of ice spheres (because everyone knows, ice sphere carving desperately needed a revolution). It’s no longer necessary to risk losing a finger. It no longer takes five minutes or more. We know you are relieved about that. These days, in about forty seconds, you can have a perfect sphere of ice. Well, okay—forty seconds and about $1300. These molds are not cheap! You can buy the smaller versions for a fraction of that price, but in order to fill your glass, you will need to step up to the 70 mm or even the 3+ incher which is going to set you back some serious cha-ching. It’s probably worth it for an upscale bar, but few home mixologists are going to be able to justify that kind of expense. Is there a poor man’s version? You bet.

Method Three: Slow Molding
There happens to be several options available for what we call slow molding. This is basically the process of freezing water in the traditional sense, only doing it with a mold or tray specifically designed to make spheres. It’s not as easy as you would think to design such a thing. Consider the fact that you need to be able to remove the sphere from the tray once frozen, and to do that, it will need to open up in halves. Also, filling the mold through a tiny hole could be pretty tedious, so trays are cleverly designed to avoid this.
If you are looking for a tray, you need to consider the glass you intend to use for your drinks. For us, bigger molds are better, so we found one that makes spheres about 2.5 inches in diameter. There is also a mold from MoMa which has a similar design. Candy makers use a silicone mold which also looks promising, although it’s more expensive. A recent search turned up a japanese plastic tray which looks pretty interesting. We got ours from an eBay seller in Japan for about ten bucks!
The process we are about to describe may seem a bit convoluted, but it works for us. We are not about to start carving with knives, so we don’t mind that it takes a little extra effort. We get to keep all of our fingers too, which we will need once it comes time to mix a drink for these things!

Our Process
The first thing we need to do with the tray is fill the bottom half with water. The water level needs to go beyond the inverted domes and flood the tray because it also needs to fill the top half of the spheres. As we lower the upper section onto the water-filled tray, water flows into the upper domes and air escapes through the tiny holes atop each sphere. As the two tray parts meet, a small amount of water is squeezed through the tops. At this point it is important to keep the assembly level so that the spherical shapes remain filled with water. Since the tray tends to want to float apart, we carefully wrap the assembly with rubber bands. Then, it goes into the freezer for several hours.
Once frozen, it’s obvious something isn’t right. Despite the rubber bands, the mold always separates. This is due to the peculiar effect of water which expands as it freezes. We can also see that the tiny air holes now have trails of ice from them. Water has been squeezed through these holes until they froze shut, and continued expansion pushed the mold apart. The result is three frozen “eggs”.

Easter Ice?
We don’t know about you, but for us, egg-shaped ice just won’t do. We understand why this happens, we just don’t like it. So, the second phase of the process involves removing the new eggs and re-freezing them to get the shape just right. Sometimes, as we de-mold the eggs, they crack into two pieces. That’s okay because we need to run them under water for a few moments to shrink them a bit, and this allows us to fuse them together again. Once they are a bit smaller, we can put them back into the mold oriented 90 degrees so the seam lands elsewhere and the pieces are held in place. We add a little more water and close down the top again. We then strap on the rubber bands and back into the freezer it goes for round two. One way to avoid this problem altogether is to simply fill the trays with ice cubes to begin with, then add water.
During the second freeze, most of the water is already ice. There’s little expansion so the mold stays together, and when we remove them, they are perfect spheres. We take them out and wrap them in plastic. Individually wrapped spheres then go into a ziplock and are stored in the freezer until needed. Taking extra care to wrap them like this is important. The freezer is a dry environment which is why unwrapped food dries out. That’s freezer burn. Ice will shrink in the freezer over time as the water evaporates or sublimates from solid to gas. Wrapping in plastic prevents this. It also keeps the spheres from sticking together and stops food odor from contaminating them.

Conclusion
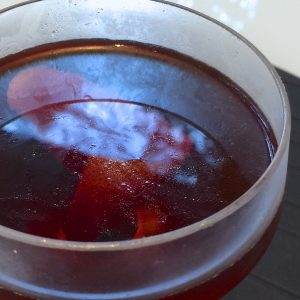
It seems like a lot of extra work, but most of it is just waiting for water to freeze. The two-phased approach is frustrating, but worth the effort to get them perfectly round. Perhaps other trays work better. We don’t know. After spending only a few minutes each day for a couple days, we have a dozen or so ice spheres ready for a party. Our stunning Old-Fashioned or Negroni cocktails will be talked about for a long time! However, the spheres would look a lot better if they were perfectly clear. The trapped air bubbles and minerals in the water also affect their stability by giving the ice more opportunity to crack apart. Finally, ice riddled with air pockets and cracks just wont be as cold as a solid crystal. There is a myth that we could avoid this by using distilled water and by boiling it twice. We tried it, and found that twice-boiled water actually does yield clearer ice—due in part to the warmer starting temperature which allows slower crystalformation, but our refreezing process obscures the effect. Still, we are very happy with the results so far.
If you decide to try this—or even if you simply use water balloons—we’d love to hear about it. Maybe you have a few tricks to help the process work a little better. Our process isn’t perfect, so we could use a little help. Next, it’s probably time to start working on long, rectangular shards for collins drinks. That should be easier than spheres, so if you are doing that too, we wanna hear about it!


I too am in the process of trying to make perfectly round, perfectly clear ice cubes. I was initially intrigued when I got whiskey on the rocks in Japan and it came with a perfectly clear, perfectly spherical piece of ice. Good luck !
I’d love to hear more about how you do it, Panda. Yesterday, I was making more of these and I cracked my tray. It still works, but I have to be a lot more careful. I was twisting it to release the ice because I didn’t want to run water over it which often cracks the spheres. Getting them to be perfectly clear has become less important for me, although if I had the Taisin mold, that’s where I might focus my energy.
Muji Online is again selling their silicone sphere mold! Check out the latest post on the subject:
https://summitsips.com/2010/04/ice-spheres-revisited
Boil your water before you freeze it to make it clear. The freezing is a result of impurities in the water freezing. Boiling it cleanses it of impurities so it should be clear. Keep in mind the water does not need to be boiling when it is poured into the cube/sphere mold. So don’t burn yourself trying to get it in fast lol. Just boil it, let it cool, then pour it in.
Thanks for the advice, Chris, but boiling only helps in so much as it slows the freezing process (warm water). Since I wrote this, a lot more has been learned about clear ice. It is generally accepted by ice makers and industry professionals that boiling is ineffective. You need pure water, and slow, directional freezing. You cannot remove dissolved gases by boiling. The only hope is to have a very slow freezing process which can be achieved with temperature control (warm water heats up the freezer and takes longer to make ice), and most important–allowing the large crystals to grow… Read more »