
Frozen water is possibly the most important component of mixology, yet the availability of ice is simply assumed in most recipes and we focus our attention on the ingredients. Despite the fact that modern refrigeration is ubiquitous, the past decade or so has seen a surprising amount of clear ice innovation for the home enthusiast.
It’s fair to say we have written a lot about ice over the years, starting with our very first post. We have covered many facets of this topic—from crushed ice for juleps to molds for making spheres. We’ve modified silicone trays to make tall shards, then found better molds for better spheres. We’ve made volcanoes, grog cones and decorative punch bowl blocks. We then made even better spheres (we like spheres a lot). But through it all, we have never described clear ice techniques, even though plenty was happening in this area. It wasn’t an intentional omission—we just never had enough direct experience or success. There were myths to dispel, ideas to investigate and products to test. Okay—we also needed more freezer space—but it is a complex topic with a lot to cover. At long last, it’s time to gather the details and share what we know about making clear ice at home.
Why Use Clear Ice?
Evolution of ice technique has been happening since the first blocks were cut from frozen lakes. Back then, service professionals and patrons alike both recognized the benefits of frozen water which, coincidentally, could be clear, depending on the source. They knew then what we still practice today—stirring or shaking a drink with cracked ice rapidly lowers the temperature of the drink, and as that happens, the ice will shed enough water to dilute the spirit to make it palatable and refreshing. Larger chunks can help maintain a chill without much dilution, while smaller pebbles are perfect for achieving the coldest temperatures quickly, guaranteeing ample dilution and a frosty glass. Like the physics that explains these effects, ice usage fundamentals have not changed in over 200 years of cocktail making.
What has changed is a growing aesthetic around the modern use of clear ice in cocktails. Historically, clear ice was not unusual—huge blocks sold during the ice trade often came from natural sources, forming under conditions that were favorable to clarity. Artificially frozen water came later, along with modern refrigeration. While some ice-making machines are built with clarity in mind, most ice at home is frozen in trays—whether automatic or hand-filled—and this ice is cloudy. But why should it matter? Is there a benefit to using clear ice, or is the appeal based on aesthetics alone?

Real Benefits
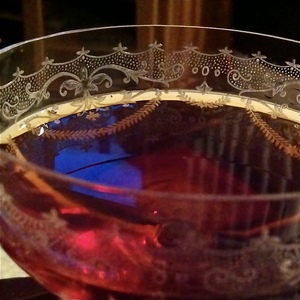
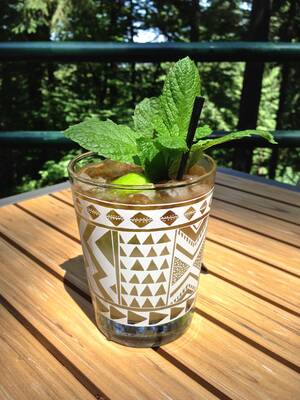
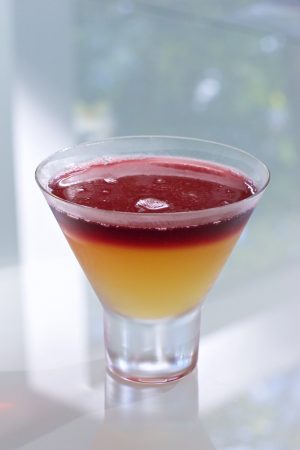
Indeed, a clear chunk of ice looks gorgeous in the glass, but there are other benefits to the drink beyond visuals. Clear ice is solid ice, so its lack of air pockets and bubbles means it can stay colder for longer because it melts slower and it is less prone to cracking apart. From a practical perspective, a near-perfect, large crystal can be a huge benefit to maintaining a drink’s chill, and it will do so more efficiently than a cloudy chunk. How much better? That’s hard to say, but in our experience, a clear sphere melts uniformly whereas a cloudy one spilts along cracks, and bubbles open into craters. The benefits are real, but the aesthetics are more the point.
What Makes Ice Clear vs. Cloudy?
As water freezes, it forms a solid crystalline structure. The molecules line up into a regular, repeating pattern like a honeycomb. If a perfect ice crystal lattice could grow uninterrupted, it would fill the space without irregularities and would be totally transparent. However, under normal atmospheric conditions, there is quite a bit of air dissolved in water. The air will not freeze solid, obviously, but it will take up space. Ice crystals often start growing from multiple places at once, and as the lattice converges at different angles, bubbles that might have been pushed out of the way become trapped wherever the ice grows together. If these gassy inclusions are big enough, they will be visible and will scatter light to the extent that the ice will look cloudy.

What can be done about it?
Myth #1: Filtered or distilled water will eliminate clouding impurities. It is true that trace minerals dissolved in water affect the quality of ice crystals, as they too will interrupt a perfect lattice. But by and large, cloudiness comes from the dissolved air. Even chemically pure distilled water will freeze with air bubbles. Should you use filtered water? Yes, it cannot hurt, but do so because you want the best flavor, not because it will make clear ice.
Myth #2: If you boil the water first, it will purge the dissolved air. This is a common misconception. Yes, boiling will drive off gas, but we are surrounded by fourteen pounds per square inch of atmospheric pressure (the weight of all of the air above us) that will quickly push air bubbles right back into the water. It’s not like club soda or fizzy tonic, but there is enough dissolved air in water that fish can breathe—that’s plenty to make your ice cloudy. So, why do people suggest boiling? One way to improve crystallization is to slow down the process. The slower an ice crystal grows, the more regular the lattice. Boiled water that is still warm going into the freezer will slightly raise the temperature of the space. This takes longer to freeze and improves the quality of the crystals—but it won’t eliminate the bubbles.
The Answer: Directional Freezing
If you can employ some technique to force ice crystals to grow in one direction, you can control what happens to the air bubbles. As long as there is liquid water ahead of the growing lattice, the air will not get trapped and can continue to move out of the way. Understanding this basic principle will help you see how clear ice develops in nature as well as understand products you can buy that yield good results.
First, let’s look at some natural cases. During the ice trade, blocks were cut from the surface of lakes. The land surrounding a lake holds heat, so when the water freezes, it starts in the center, at the surface. Ice crystals grow downward, pushing the air and impurities down and out of the way so when tradesmen cut blocks from the center where it is deeper and cleaner, clear ice is more likely.
Icicles hanging from rooftops are often clear because the ice forms in layers as new drops of water cling to previous ice. This is a different kind of directional freezing, but the idea is the same. As the water drips down the surface of existing ice and freezes, nothing surrounds the drops that will trap bubbles. Air and impurities are washed aside as the crystal lattice grows from the inside out, building layer upon layer. The air is continuously pushed to the outside as the clear icicle grows.
Now, imagine filling a typical plastic ice cube tray and consider what happens when you place it in the freezer. The open tops of each cube will begin to freeze forming a thin layer similar to a tiny lake. But if you have ever removed a tray before the ice is ready you know that crystals in the cubes also start forming from the sides and from the bottom. As crystals grow from the outside in, the center freezes last. The water is not circulating, so bubbles cannot get washed away. With the top already frozen, air bubbles are trapped. Crystals will meet at various angles and the bubbles will get caught throughout the cube.
Control Freezing with Insulation
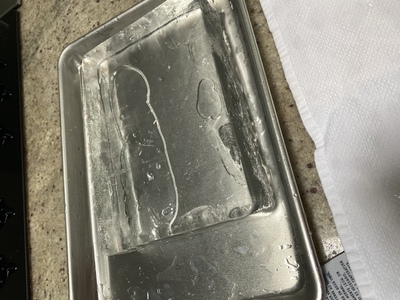
If you construct a special freezing chamber with insulation along the sides and the bottom leaving the top exposed to the freezer air, ice will form on the top and grow downward. You have trapped bubbles, but the insulation is preventing the sides and bottom from freezing. Cold temperatures will eventually penetrate the insulation, but by the time it matters, a thick, clear chunk of ice will have grown down from the top, squeezing the air into the remaining liquid water at the bottom. If you stop the process at this point, you will have a clear chunk of ice and you can just dump the remaining water. Let it go longer and you will have a block that is clear on top and cloudy at the bottom. In this case, you can simply cut the bottom section away.
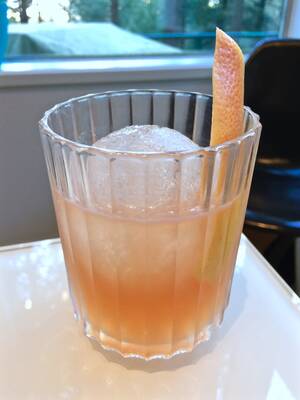
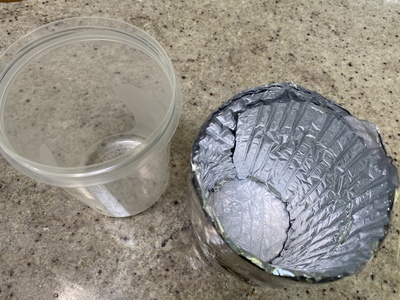
In a simple experiment, you can wrap a plastic deli container with silver insulating bubble wrap, fill it with water and place it in the freezer. Clear ice will form on top, and bubbles will be pushed to the bottom. To do this on a larger scale, the simplest and cheapest way to make a large block of clear ice at home is to control the directional freezing this way using a plastic cooler. That’s right—a cooler filled with water and placed in the freezer with the lid removed will freeze from the top surface downward—just like a lake. And because the sides and bottom are insulated, ice only forms at the open end. You can pull the cooler out before it all freezes and you will have a nice clear slab. The bigger the cooler, the bigger the slab. If you wait longer, the water at the bottom eventually freezes and traps the bubbles. But this cloudy section can be removed leaving you with a manageable clear slab which can be scored and split into great cocktail cubes and shards.
Temper First
If you decide to try the cooler or a DIY insulated container, you may need to break down a big block or remove cloudy sections. Before you begin to hack away, allow your ice to “temper” by leaving it on the counter for 15 minutes or more. Fresh out of the freezer, a large chunk may crack unpredictably under thermal stresses, but left to warm slightly, it becomes stronger and easier to control. You will have plenty of time to work with it before it starts shrinking, and placing it on a towel or in a baking tray will control some of the mess and keep it from sliding around.
There are good products available now that are designed to take home freezing innovation to the next level by saving you some work. Instead of cutting and splitting a large slab, insulated molds provide shapes for spheres, cubes or even long shards. We like the Wintersmiths lineup having used their Ice Chest with success, and later, participated in their Phantom kickstarter program—both of which which leverage perfectly shaped silicone molds within an insulated container. Smaller versions do exist from a variety of manufacturers that understand directional freezing and have incorporated insulation and bubble reservoirs into their designs.

Silicone molded products are great for achieving smooth shapes, but if we were to pick a favorite method, the Coleman cooler is by far the most practical, inexpensive solution. At only 5 quarts, it’s small enough to make at least temporary room for a day or two in most freezers. It has a removable lid which enables directional freezing without getting in the way. It has almost perfectly straight, smooth sides on the inner surfaces making it easy and quick to de-mold. Finally, the resulting slab you get can be carved up into a dozen perfect blocks (if you are careful) that fit typical glassware.
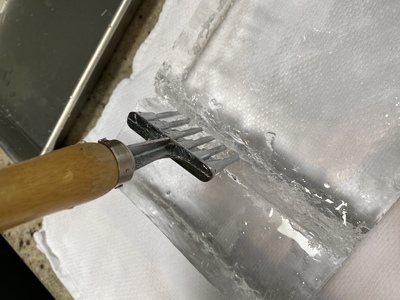
It can be handy to dedicate a cheap, stainless steel bread knife to your ice projects for use as a saw to score lines in large slabs. You want something with a good handle because your hands will get cold and slippery as you work to breakdown large ice. We are also very impressed with the Barfly Ice Knife—a strange-looking high-carbon blade that easily cleans up ragged edges when a scoreline splits irregularly. It can also double as an ice pick for breaking smaller pieces or piercing holes to drain water. A wooden mallet comes in handy to tap the back of your bread knife and drive the serrated edge into a score line and coax the ice to split.
We usually wrap finished chunks and pile them back into the freezer, so have some plastic wrap ready when you start to break down pieces or de-mold shapes. Wrap them up tightly and place them in a freezer bin. To use your ice, just remove them from the freezer, unwrap and carefully slide them into a glass before you start mixing your drink. This will chill the glass and gives the ice time to temper again. Tempering always helps strengthen large ice cubes before you pour liquid over them.
Clear ice definitely has its rewards, and preparing chunks for use can be a fun project. If you mess up, it’s just water and you can make more. Even misshapen pieces are useful. If you have used directional freezing to make clear ice, let us know in the comments. Also, if you have tried modern products that make this process easier, we’d like to hear about it!