Over the years we have picked up many techniques that we use consistently to make the most of homemade ingredients, storage, and cleanup. If you enjoy making cocktails at home, these tips can up your game and improve your results. Many should become second nature as you explore cocktails at home.
1. Save bottles you like that have good closures.
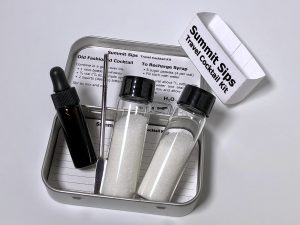
It is one thing to save empty booze bottles for homemade projects, but consider the details. We like clear bottles so we can easily see if syrups are going bad or to judge the clarity or color of infusions. Cork stoppers are nice for bottled or batched cocktails, but a solid screw cap is safer (avoid flimsy thin metal screw caps). Smaller bottles are super handy for sharing gifts or storing refrigerated items, especially if you add a custom label and seal the cap with shrink wrap for a finished look. We also reuse easy-pour rubber spouts with caps from gourmet vinegar and olive oil.
2. Clean bottles with uncooked rice.
We have been doing this so long it seems obvious now, but we wonder if others know this trick. If you have a dirty bottle with hard to reach residue inside the neck or shoulder, or you need to remove stuck sugar rings (or mold), or even thick gunk from the bottom, this technique will save a lot of frustration. Add a drop of soap and a spoonful of uncooked rice with just a little water and cap the bottle. Then, shake it really hard! As you do, the rice will act like a mild abrasive, working away the dirty bits. Pour off any foam and rinse. The rice will sink in water, so you can use it again if needed, or pour it into the next bottle. Discard it as compost.
3. Store empty bottles with a little bit of alcohol.
After we clean a bottle or remove the label, we always shake out excess rinse water and add a little bit of alcohol back in. This small sacrifice will sterilize the bottle. Keeping it closed will stop dust (or bugs) from climbing in while the alcohol prevents any weird smells from developing. Everclear works great, but so does vodka or gin. Do you have a base spirit that you don’t really like? Save it for cleaning or bottle storage. It only takes small amount–just enough to swirl around and coat the inside–and your bottle will be ready to go when you need it. We use this tip on everything from full-size bottles down to one-ounce dropper bottles.
4. When making syrups, use a formula to pre-calculate the ratio amounts for perfect volume.
This one is tricky, but the two numbers you need are 1.6 (for 1:1) and 2.5 (for 2:1). What does that mean? Well, say you want to make a 1:1 simple syrup and exactly fill a 2-cup bottle. Take your bottle and divide by 1.6 to get your ratio amounts. So, a 16-ounce bottle, divided by 1.6 equals 10. You need to add 10 ounces (by volume) of granulated sugar to the bottle, plus 10 ounces of water. 10 plus 10 does NOT equal 20 ounces of syrup because the sugar volume goes down as it dissolves. It will exactly fill 16 ounces after you shake it to dissolve. If you want a 2:1 syrup, divide the bottle volume by 2.5. That’s 16 ounces divided by 2.5 equals 6.4. So you need 6.4+6.4=12.8 ounces of sugar, plus 6.4 ounces of water to fill the bottle once dissolved. If you use a hot process on the stove, add these amounts to a sauce pan, make your syrup, and pour it into your perfectly sized bottle.
5. If you are making simple syrup, make gum syrup instead.
If you pick up some food grade gum Arabic (we buy acacia senegal, which is just another name for it sold as tummy fiber from Amazon) add a few heaping spoonfuls to the sugar and mix it in before adding water. The gum dissolves slower in a cold process, but after the syrup sits for a day or so any floating gum will disappear. Why do this? Gum Arabic adds texture to the syrup which is fantastic for old classics. It also helps preserve the syrup and inhibits sugar crystallization.
6. Add a splash of vodka to preserve homemade syrups (or just keep it clean).
It is often referenced in project recipes that one way to preserve a finished syrup is to add a little vodka or neutral spirits to the top of the bottle. The idea is that this prevents contaminants from entering the syrup from above. While true in theory, a clean, capped bottle should not be dirty to begin with (especially if your are following #3 above). The biggest problem is that as you use the syrup, you lose this protective layer and it can become contaminated. Be extra careful with your bottles and avoid touching the neck or wiping drips with a dirty rag. Extra care during use can make a syrup last months versus weeks.
7. Use wide mouth Mason jars for projects.
The Mason jar is a workhorse around the kitchen. Canning traditions aside, a quart jar is fantastic for making cocktail ingredients. Many how-to recipes or infusions will have you making a 750ml bottle’s-worth of final product, and 32-ounces is a nice size that accommodates that plus some head space or room for other items. Wide mouth versions of jars are simply easier to work with and clean.
8. Freeze additional syrup.
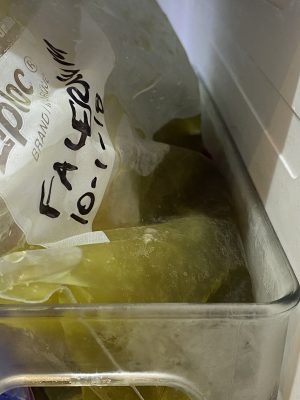
We started doing this a few years ago and never looked back. Some of the best home recipes (like grenadine, ginger syrup, orgeat, falernum, passion fruit syrup) are not written with your bottle size in mind. You might also be making a large batch to justify the effort. In most cases, we end up with more syrup than we like to store in the refrigerator, and we hate to see hard work turn bad before it gets used. So, we started freezing all of our syrups. Whenever we run out, we can pull out the extra and refill. Most syrups won’t actually freeze but will thicken, which means you could simply spoon out what you need when you need it. We do that with orgeat because we make it using expensive marcona almonds. It will last forever in the freezer in a small jar.
9. Consider putting refrigerated syrups into square bottles to save space.
We made a commitment to small, square bottles to save room in our refrigerator door. Square bottles sit neatly next to each other and can be stacked two-deep. Smaller bottles will get used faster so you can keep them clean and refill from the freezer if you follow #8 above.
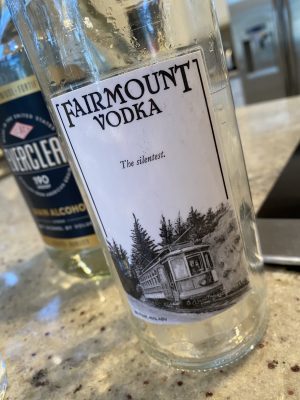
10. Mix your own vodka.
We always have a bottle of Everclear around for projects like limoncello or some other liqueur. We don’t always have vodka. However, you can mix up vodka as required whenever a recipe calls for it. Just add water to neutral grain spirits in the right ratio to reach 40% alcohol by volume (80 proof). If you are in a hurry, take full-strength 190-proof and dilute it 50/50 with water. This is higher than most vodka at 95 proof, but for a Moscow Mule, nobody will care. If all you have is 151, do the same. It will be just under, but again, nobody will know. We have even gone so far as to mix a whole bottle of “house” vodka to save some cash (and feature a funny label). The ratio for 190-proof neutral grain alcohol is 8:11, so 8 ounces of Everclear plus 11 ounces of water will give you 19 ounces of 80-proof vodka. For 151-proof the ratio is 8:7, so 8 ounces of 151 plus 7 ounces of water will give you 15 ounces of 80-proof vodka.


This is such an informative and wonderful article! Thank you so much!